FYI,
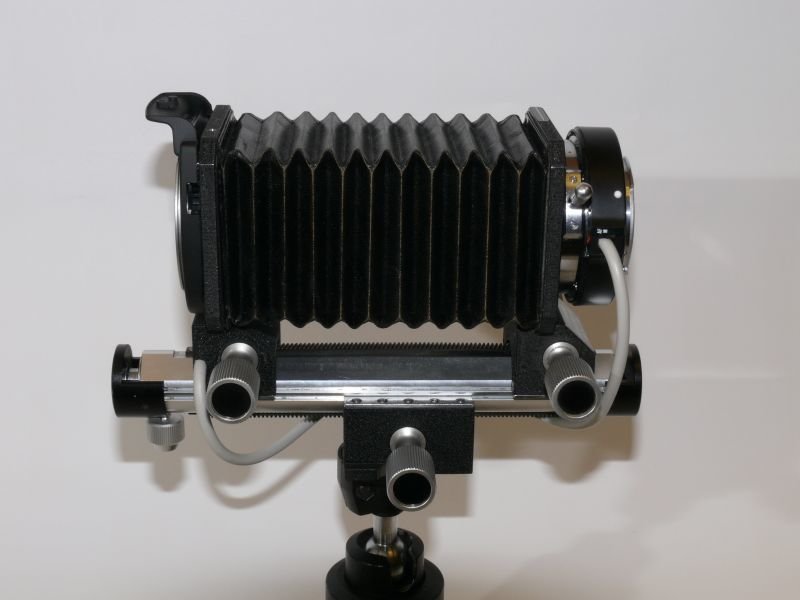
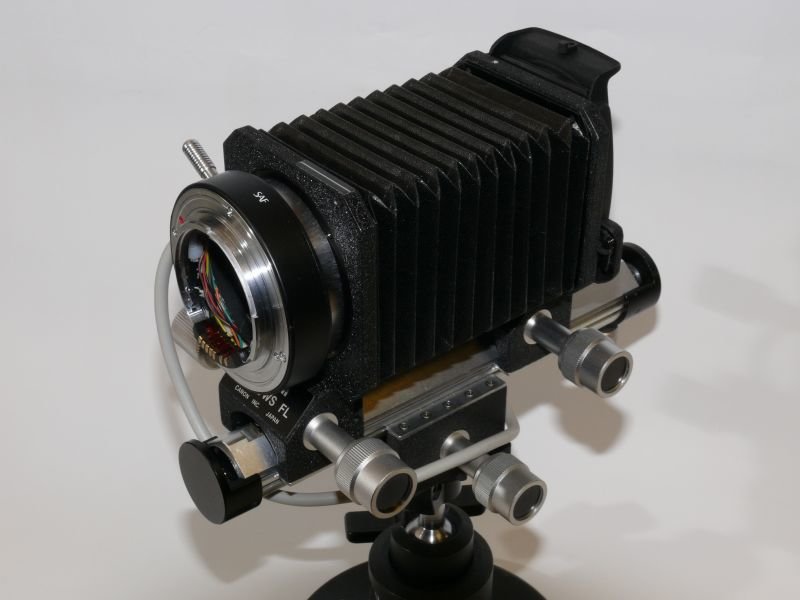
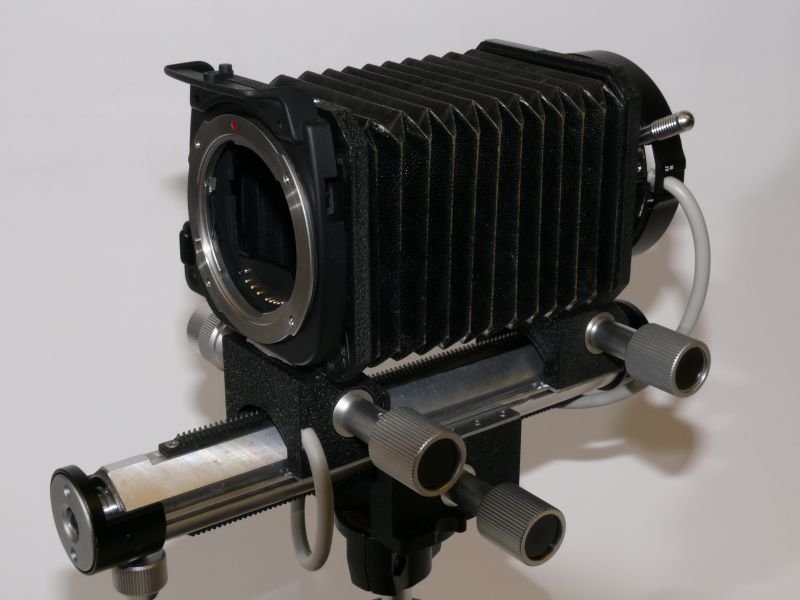
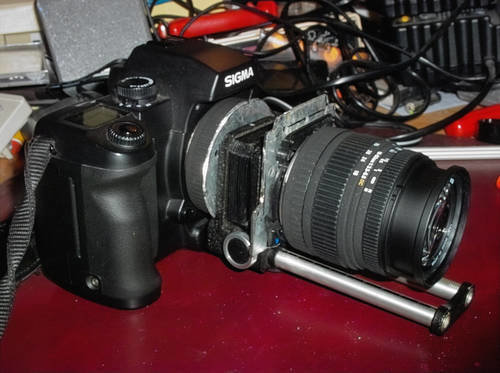
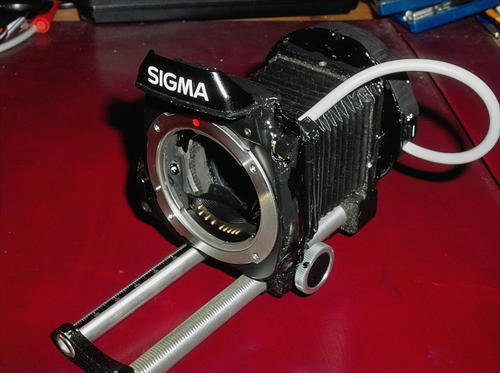
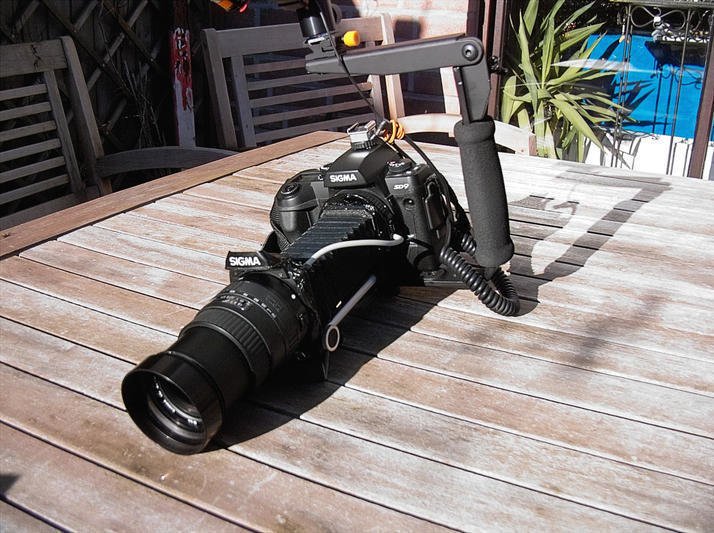
Aim: To convert a bellows into an auto bellows to have connections for automatic diaphragm release and transmission
of lens information to permit open-aperture metering.
Additionally, all of the functions for Sigma SA are transmitted, e.g. data in exifs are correct.
Whether such a conversion is of any use, the readers may decide on their own.
Parts I used:
A Canon FL type bellows (other models might be suitable as well!)
A bayonet and some bits and pieces from a broken Sigma (kit)lens (any other SIGMA SA lens will do!)
A Sigma SAxx camera (to be canibalised)
A few details still have to be finished off in order to achieve a "professionell"look.
Firstly, the bellows itself, it should have a reasonable size with about 70x70 mm front-and back plates,
to comfortably fit the bayonet and the modified mirror housing.
I chose the Canon FL type bellows for the following reasons:
1.Front and back plates are big enough.
2.The moving parts with their drivings are hollow, so cabeling is done much easier and looks more professionell.
3.The front bayonet fits perfectly into the rear bayonet with the attached locking lever.
Doing so allows the camera to be locked straight and easily to the bellows instead of twisting it on.
4.The bellows is of very good mechanic quality, everything is screwed and can be disassembeled easily.
5.The guiding plates at both sides of the boom are adjustable for smooth and stable movement.
6.The bellows has a limiting pin, similar to a "depth limiter" at a drilling machine, it helps to protect the front lens.
7.At the front is a 3/8" thread to take up accessoires, a duplicator for example
8.Last but not least, a focusing rack is built in.
To prepare the bellows for conversion, all parts of the mechanical diaphragm release have to be removed.
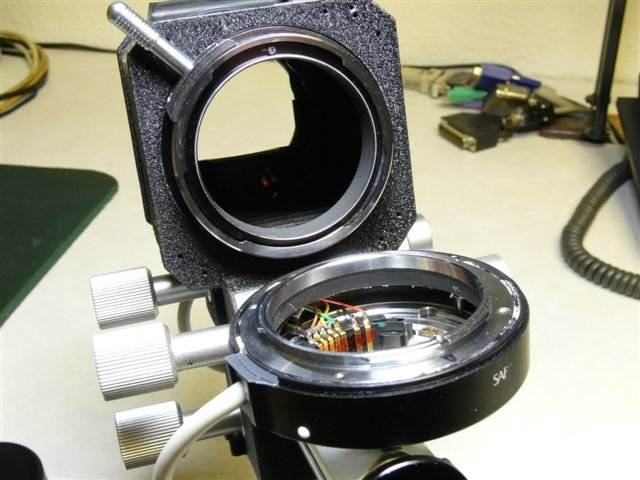
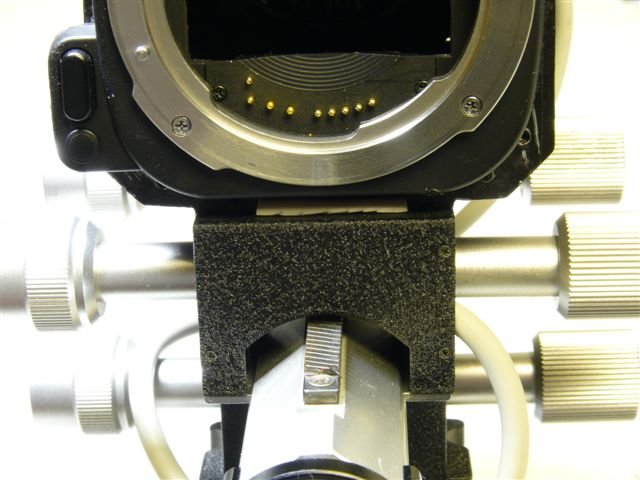
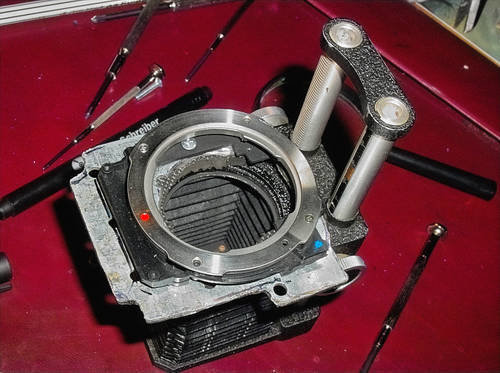
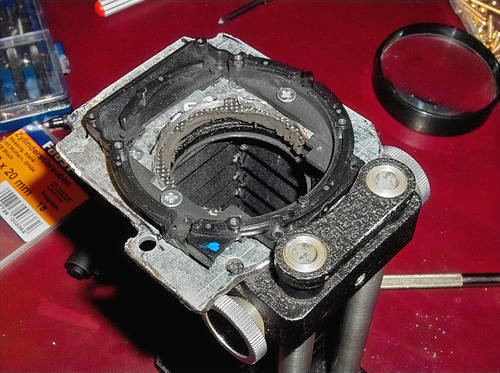
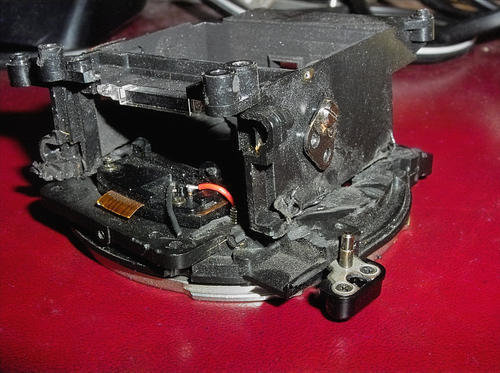
The mirror housing has to be cut down and must be perfectly flat to match with the front plate.
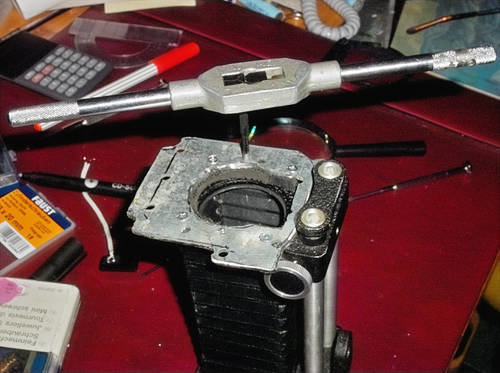
It will be fixed with 4 screws. The holes for this 4 screws have to be drilled and threaded with a M 1,5 , 1,8 or 2mm
thread, whatever is at hands.
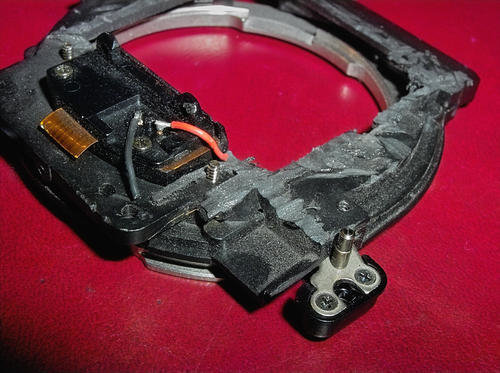
The front side of the SAxx camera case has to be cut down to fit.
The release button is very important. It must be functional in order to hold the lens in its exact position.
This is necessary for the electric contacts.
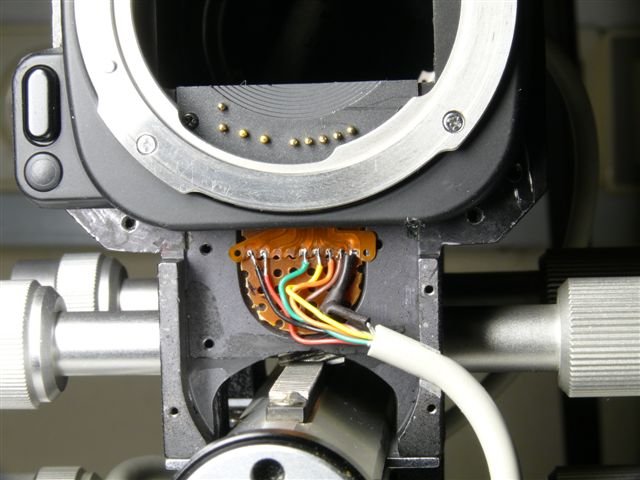
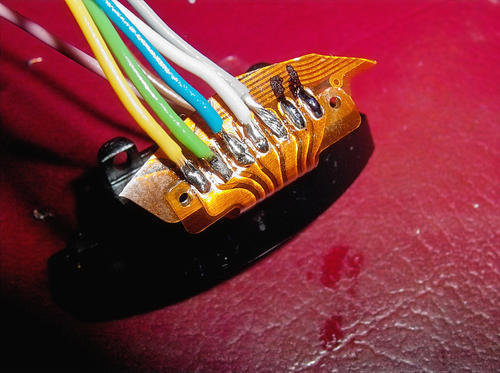
Care has to be taken not to damage the flat ribbon cable, the cable leading to the back is soldered to it.
The rear part is relatively simple.
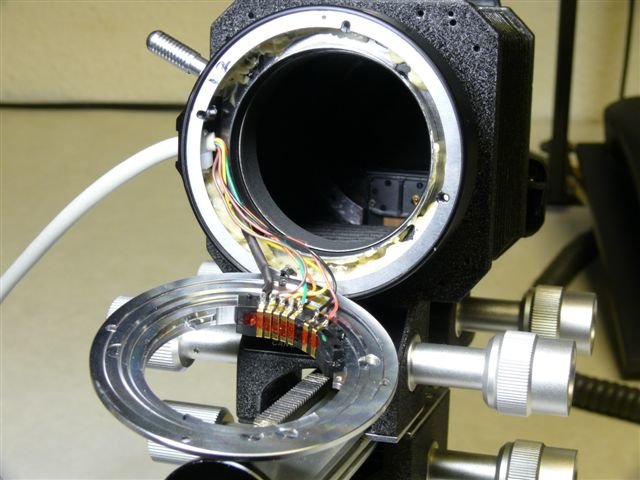
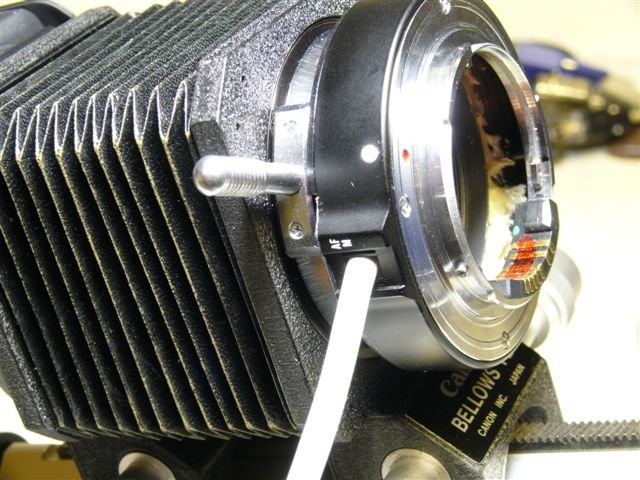
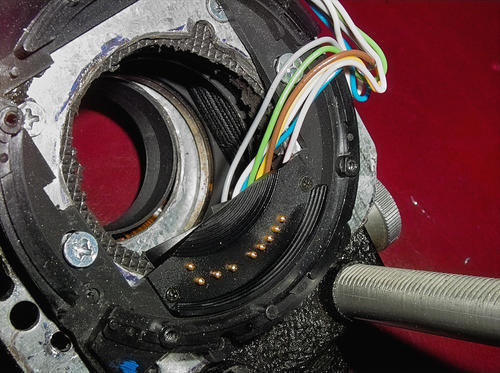
I used the bayonet with the contact block and the matching rear ring from a broken 24-70mm lens.
Into this ring I glued the FL bayonet from the front plate.
Pay attention to the mark, it should be in the 10 o´clock position when attached, viewed from the back.
Now the cable has to be connected and you are done.
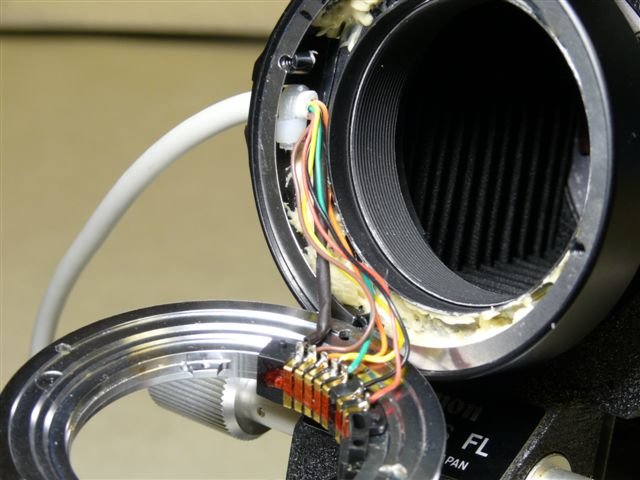
You will need a cable with 7 wires.I took a cable from an old PS2 keyboard extension (6 wires + shield)
It only has a Ø of 4,5mm and is very flexible. The wires are connected 1:1 front to back.
Please check with a multimeter for connectivity and short circuits!!
It might be a good idea to put a male/female connector onto the cable, so it can be used reversed for a retro mounted
lens. But that can be done at any time later as well.
I fixed the cable at the back with a small 3mm cable tie and at the front I cut a small groove, just big enough
to get the cable fixed.
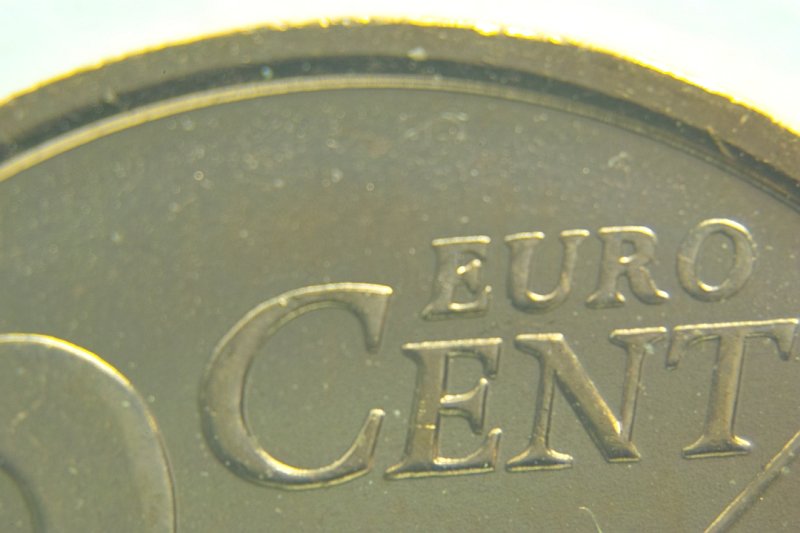
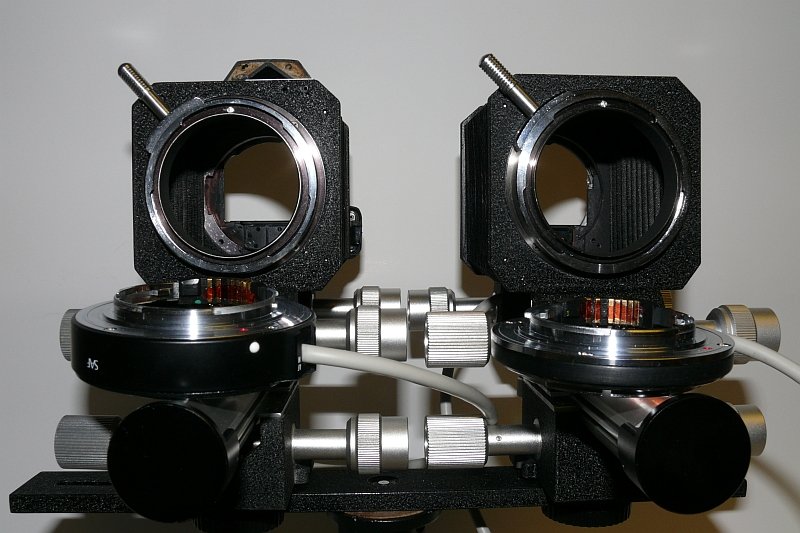
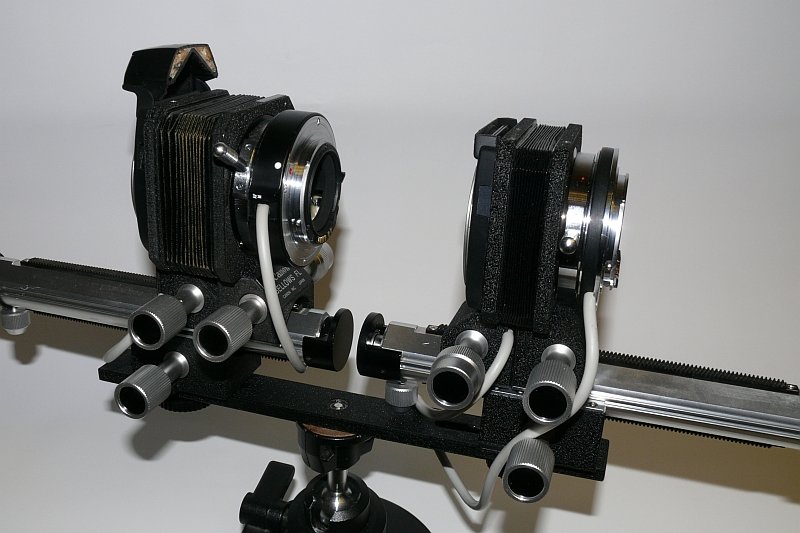
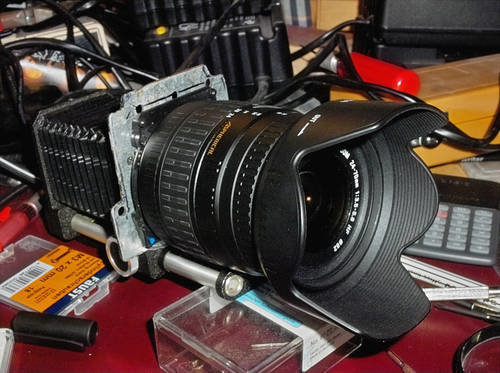
I think the pictures show enough details and also the "Mark II version". ;-))
I did the "Mark II" with emphasis on minimum extension, as the first one has 70mm :-((
Any comments, questions and suggestions are welcome and should be discussed here to the benefit of all.
Have fun and good luck building your own Sigma Auto Bellows.
View attachment 103
View attachment 104
View attachment 105
View attachment 106
View attachment 107
View attachment 108
View attachment 109
More pictures on following page
