DPR Forum

Welcome to the Friendly Aisles!
DPRF is a spin-off of dpreview. We are a photography forum with people from all over the world freely sharing their knowledge and love of photography. Everybody is welcome, from beginners to the experienced professional. From smartphone to Medium Format.

DPRF is a community for everybody, every brand and every sensor format. Digital and film.
Enjoy this modern, easy to use software. Look also at our Reviews & Gallery!

SD14 in Astrophotography

I found Gold !!!

Curious about the photographer's work behind the March 6th Moon/Venus conjunction image on NASA's Astronomy Photo Of the Day web site, I checked out his web site, the link is on the APOD page below the image and I'll repeat it here:

Ancient Starlight

On Drew Sullivan's Technical page, I became curious about the software that he used to make the manipulations correcting for internal optical reflections for his Pleiades image. I've noted problems with my stacked star field images shot through my SD14, where I get an imager induced artifact, the bright triangular blooming phenomenon associated with the brighter stars, and I'm sure his technique would eliminate this.

I emailed Drew and he just sent me a reply, pointing me to a software package published by William-Bell, Inc.

"Handbook of Astronomical Image Processing" by Richard Berry and James Burnell, 6" by 9", 684 pages, Hardbound, with AIP4Win2.0 on CDROM

As described by Dennis Di Cicco, Senior Editor of Sky and Telescope magazine, "It's the finest book to date covering the entire gamut of digital astrophotography. It should be mandatory reading for those shooting digital pictures of the Moon, planets, or deep-sky objects regardless of what camera or software they use."

William-Bell, Inc. specializes in books on astronomy and I have their text "Astronomical Algorithms" by Jean Meeus.

Two aspects that really impressed me was the list of AIP4WIN features spanning 5 pages:

AIP4WIN 2.0 Feature List

and the list of supported Camera formats spanning 3 pages:

Supported Cameras

which includes all three Sigma Cameras, the SD9, SD10, and SD14 !
 
Very informational thread! I have read quite a few image processing texts...will look this book up also with its focus on Astronomy and photography related to it...something that i dont understand at the moment :) though it fascinates me a lot as i look up to the skies whenever i wish to experience magic for free!

Thanks for sharing!
 
The Gold is a bit lacking

After downloading and installing Version 2.3.0 of AIP4WIN and receiving my copy of the book "Handbook of Astronomical Image Processing" which contains the serial number necessary to register the software license, I was disappointed to learn that, despite all three Sigma cameras being listed as being supported, I just could not load a X3F file into AIP4WIN.

I sent an email to the support address and was contacted by both authors, Richard Berry and James Burnell. The bottom line is a third party provided their RAW camera support and until I provided them with a sample X3F file, they never had one to work with prior. I have since sent them my collection of 24 Cassiopeia X3F files as well as 16 bit / channel TIF files that I created from the X3F files with SPP. Since I only have a SD14, I would appreciate anyone with a SD9 or SD10 interested in aiding this effort by providing files to ensure support of those cameras as well.

-=-=-

I have been corresponding with Drew Sullivan in regard to flaws in the stacked Cassiopeia image posted earlier in this thread and I have made progress in the area of Sigma Astrophotography.

First, if your astronomical image manipulation software can not handle the X3F format, use SPP to create 16 bit / channel TIF files. This simple change from my original process flow made all the difference when stacking and SPP gleaned some really nice results on individual frames.

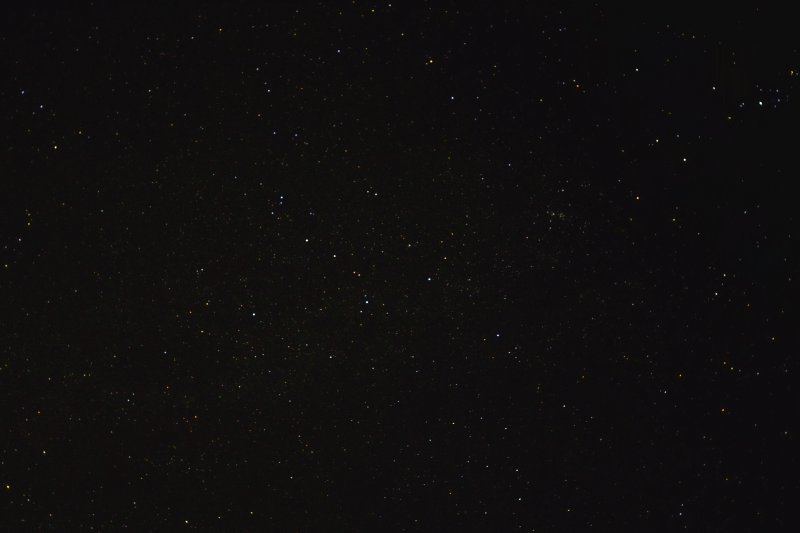
Here is what SPP did with a single frame:

View attachment 1262

There are still flaws in this image, but they are limited to only the 5 brightest stars exceeding 98% of the image dynamic range. This means the exposure through my Sigma 28 mm f1.8 EX DG Aspherical Macro of 16 Seconds, f1.8, ISO 100, with a white balance of 6500K (Overcast), was marginally too long and the photosites receiving light from these stars were close to being saturated. For this image I set the final image white balance to the star πCAS which has a magnitude of 4.95 and was nicely exposed. I did boost the saturation to bring the stellar spectral colors into better view. Later, I reviewed the faintest individually discernible stars and found the limiting magnitude, the point beyond which a star blends into the background, at 10.0. For a point of reference, the limiting magnitude for unaided human vision, as the best of conditions is 6.

Here is an image with these points identified:

View attachment 1263

Remember, this is the result of an individual 16 second exposure which was processed in SPP
 

Attachments

  • SDIM0258_s.jpg
    EXIF
    SDIM0258_s.jpg
    31.3 KB · Views: 31
  • SDIM0258_Labeled_Text_s.jpg
    EXIF
    SDIM0258_Labeled_Text_s.jpg
    40.3 KB · Views: 31
Hi Steaphany

I'm curious if you've done any more astrophotography with your SD14 lately.

I've only had my SD14 for a little while, but after seeing yours and some other examples, this seems like it would be a fun thing to do.

I just made a DIY cable release last night so I'd be able to do this even easier. I've also seen some designs for making a simple barn-door tracker that would be good enough for stacking images.

Unfortunately I'm using a Mac, and I have yet to find any of these astrophoto stacking programs made for Mac :(

One of these nights soon when it's clear I'm going to have to go out and see what I can get with just a tripod and an 18-200 lens.
 
Jason,

My latest SD14 astrophoto was an experiment that I did a couple weeks ago.

I tried to photograph Orion and the surrounding area with the internal IR blocking filter removed to see if I could get better imaging of the various nebula. My results were not what I expected and it turns out that the sensitivity of the Foveon imager caused even short exposures to be saturated by the brightness of the stars. Instead of being small points of light, stars like Betelgeuse, a variable red giant varying from 0.4 mag to 1.3 mag, just ended up being, comparatively, a large round red blob.

I have searched and found several US patents which Foveon received on their technology. It turns out that the channel sensitivity curves have quite a bit of over lap and I'm suspecting that much of the compensation must be occurring in the SD14. When the IR blocking filter is removed, the resulting image is almost devoid of any Green, Blue is weak, and Red dominates. I will have to plan a series of experiments to better characterize how the SD14 performs for infrared and broad spectrum photography and astrophotography.

The weather or bright Moon has been in the way of further attempts.

I have two recommendations for your astro image processing. First is a shareware image stacker which runs on the MAC:

Keith's Image Stacker

Since all my computer facilities are either Sun Microsystems UNIX/Solaris or Intel Windows XP based, I have no hands on experience with Keith's Image Stacker.

The second is a book with DVD containing the tutorial images from Willmann-Bell:

Photoshop Astronomy by R. Scott Ireland

Since Photoshop runs on both the PC and MAC, this text will suite both environments. I have this book in my astrophoto collection.

One thing you need to keep in mind is having your shutter open long enough to collect a good exposure while also being short enough for a SD14 on a static tripod to still show stars as points and not streaks. It is also amazing how quickly the light from a star can saturate the Foveon photosites at even ISO 100. I recommend that you choose a static White Balance, I normally use Overcast which corresponds to 6500K.

I hope this helps and I'll be looking forward to seeing what you can accomplish.
 
Steaphany,

I'm glad you threw in that little tidbit about the effects of IR on the other channels of the Foveon chip. I had actually noticed this effect while trying to do some visible+ir shots soon after getting the SD14. The only thing the green channel contained was the very brightest of highlights, and I wasn't sure why. Looks like you cleared it up for me :)

Thanks for your suggestions. I had thought of just using Photoshop, but I figured it would get very tedious with more than just a few exposures.

Keith's image stacker looks like it'll probably be my best bet.

I found a few other programs as well, some look like they have potential.

Hopefully I'll be able to get out there soon. Been having weird snowy weather lately, so it's not quite prime conditions right now.

Thanks
 
Also, I had another thought about the IR thing....how short were your exposures? I'm curious if you could stop the aperture down and shorten the shutter time enough to get a decent exposure(s)...then stack those and use them purely for Luminosity, and also take some shots with the IR filter on for RGB...just a thought.
 
I used a range of shutter speeds.

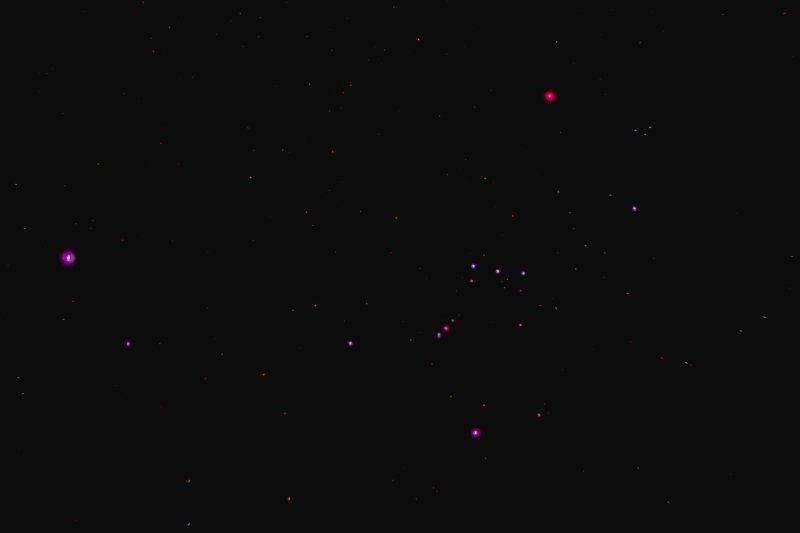
All had the SD14 set to Manual Exposure and ISO 100. I used my Sigma 28mm DG EX Macro lens set to manual focus, and the internal IR blocking filter was removed.

The best result for the evening was with a 10 Second Exposure through a LDP X-NiteCC1 Color Correction Filter that I have to easily switch between Infrared/Broad Spectrum and Visible light shooting with out having to remove the lens from the SD14 in the field. (Not something I want to do when there is a risk of getting dust on the imager)

View attachment 1363

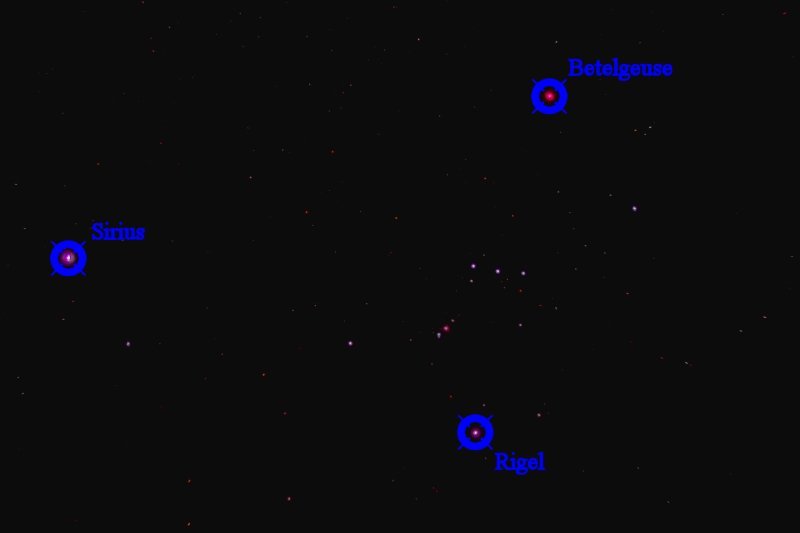
As noted here, the brightest stars severely saturated the imager:

View attachment 1364

As you can see, it can be difficult to balance such an extreme range in intensities.

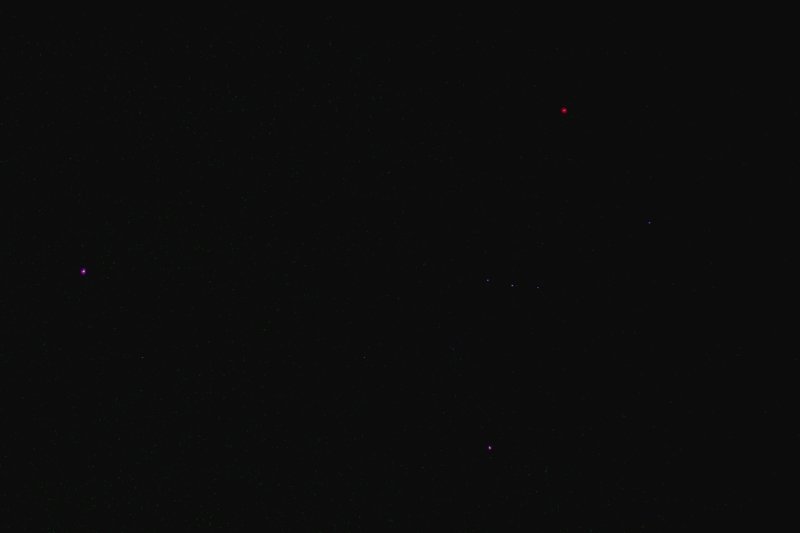
Here is another image where the only change was a 1 Second Shutter:

View attachment 1365

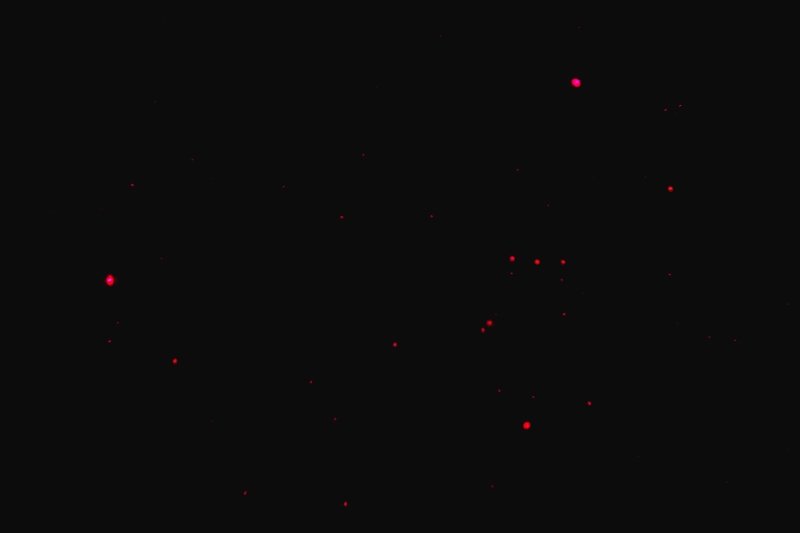
My attempt at Visible Red + Infrared exposure was a short 3.1 Seconds through a 25A filter:

View attachment 1366

I was intending on shooting more and getting a better range of exposures, but clouds were moving in ruining the view.
 

Attachments

  • SDIM1426s_10S.jpg
    EXIF
    SDIM1426s_10S.jpg
    29.7 KB · Views: 24
  • SDIM1426s_10S_Labeled.jpg
    EXIF
    SDIM1426s_10S_Labeled.jpg
    12.8 KB · Views: 18
  • SDIM1430s_1S.jpg
    EXIF
    SDIM1430s_1S.jpg
    102.5 KB · Views: 16
  • SDIM1391s.jpg
    EXIF
    SDIM1391s.jpg
    15.2 KB · Views: 18
Wow, that is amazing just how much IR is collected from those bigger/closer stars.

It would be interesting if there were an easy way to use a few very long IR exposures to pick up the faint stars and combine that with several visible frames to take care of the bright ones and the colors.

Since I don't have the filters for the front of the lens (boy are 72mm filters expensive) I think I'll just not bother with removing the internal filter any time soon :)

Hopefully I get a clear night soon to try some of this myself.
 
Jason,

Check out the thread The Moon, I just checked and as I write this, the Moon is presently 53% illuminated. An easy subject to get some experience with, while also being quite challenging at the same time.

The best time to photograph the Moon is when the terminator, the boundary between the Sun illuminated and dark sides meet, is visible. The mountain tops, crater rims, valleys, and crater floors provide a nice sense of 3D and spherical dimension to the Moon.

During the full and near full phase of the Moon, you'll loose these depth cues and the Moon will look flat.

A good web site to see what's going on in the sky is Heavens Above and a good free open source computer planetarium is Stellarium. It runs on Windows, MAC, and LINUX showing a realistic sky in 3D, just like what you see with the naked eye, binoculars or a telescope which is perfect for planning astrophoto sessions and for identification of objects recorded in your photos.

I do recommend that you use a hand held GPS receiver. Knowing Latitude, Longitude, and Elevation are essential to set your location on the Heavens Above web site and in Stellarium. Plus, the time displayed on a GPS receiver comes from the atomic clocks carried on the GPS satellites which can be very useful when you need to know the exact time for your observations and photography.
 
Back
Top