DPR Forum

Welcome to the Friendly Aisles!
DPRF is a spin-off of dpreview. We are a photography forum with people from all over the world freely sharing their knowledge and love of photography. Everybody is welcome, from beginners to the experienced professional. From smartphone to Medium Format.

DPRF is a community for everybody, every brand and every sensor format. Digital and film.
Enjoy this modern, easy to use software. Look also at our Reviews & Gallery!

SIGMA's Garish Red Problem ...

Hi, guys!

I currently run 1.08. So I don't think that is the problem.

Sincere regards, Jim R

Apparently the problem was solved after V1.07 . However Firmware does get corrupt , like all software , and a reinstall of firmware might be in order .

There is nothing to fear if you have an external power source for your camera , or Freshly charged batteries.

This is probably the best link to Sigma Downloads and instructions:

http://www.sigma-sd14.com/software/firmware/

[Ver. 1.08]
Corrects the occasional phenomenon of an image recorded in RAW format appearing to have an unnaturally large file size.
Corrects the rarely occurring error of camera freeze and image recording failure when shooting continuously or if the shutter button is pressed when the CF Card Busy Light is blinking.
When Bulb Mode is used Sigma Photo Pro now displays the actual shutter speed used in the exposure rather than just showing the word "Bulb".

Luis
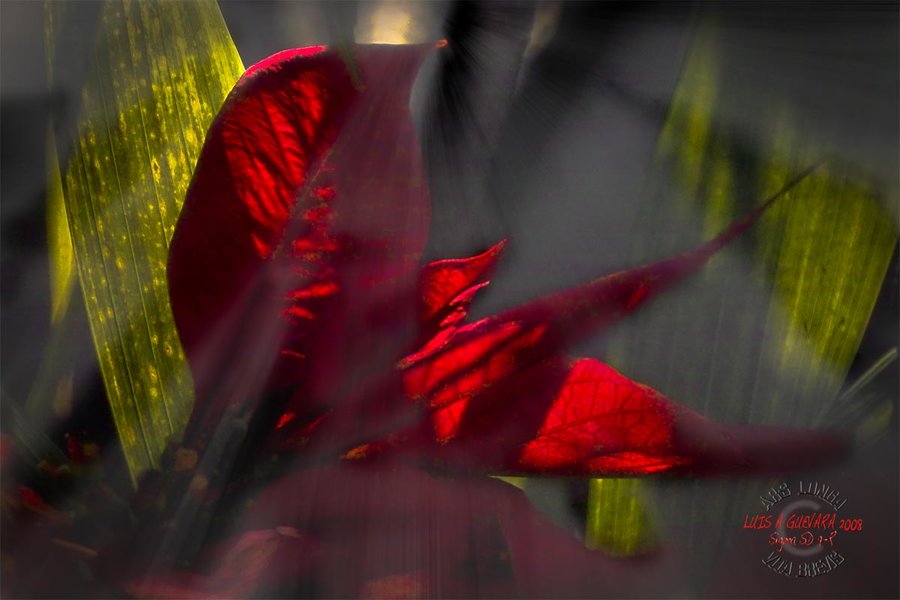
 
Merry christmas

Merry Christmas Everybody !!
View attachment 908

with no red color color problems. Luis
 

Attachments

  • IMG02229-Final-sRGB8Bits1200.jpg
    EXIF
    IMG02229-Final-sRGB8Bits1200.jpg
    107.9 KB · Views: 19
I just found a way to selectively modify individual ranges of color with PhotoShop. I downloaded Klaus' original Rose image to play with using a technique where an Hue/Saturation Adjustment Layer is applied to a color selection mask.

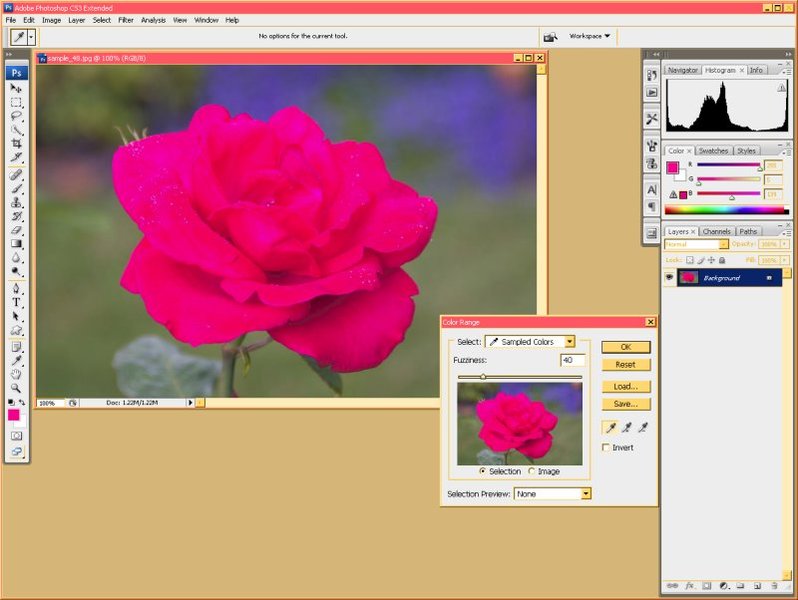
Here I have opened the Rose in PhotoShop and chosen the Select->Color Range tool:

View attachment 1312

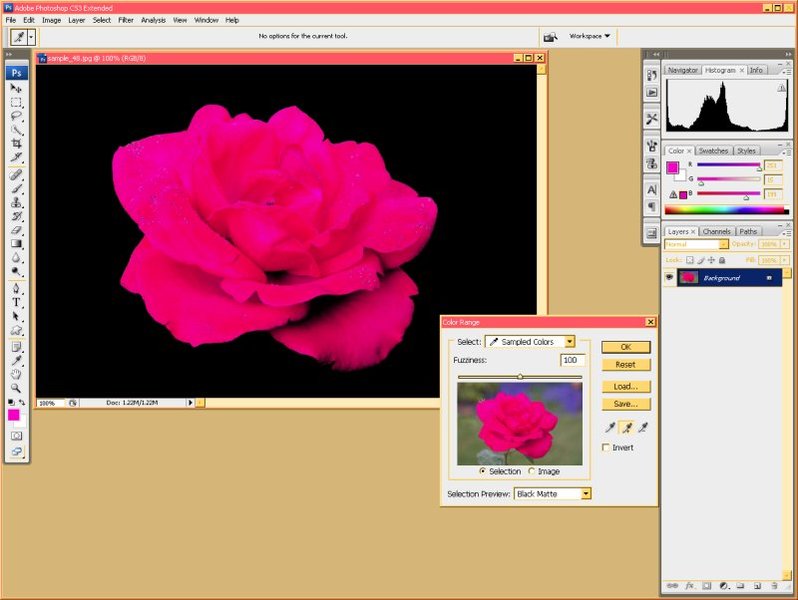
Using the additive color picker, I click on the Red's and Magenta's in the Rose, I also adjust the Fuzziness to select the Rose hues with out picking up anything from the background. The Selection Preview shows that only the Rose hues have been selected:

View attachment 1313

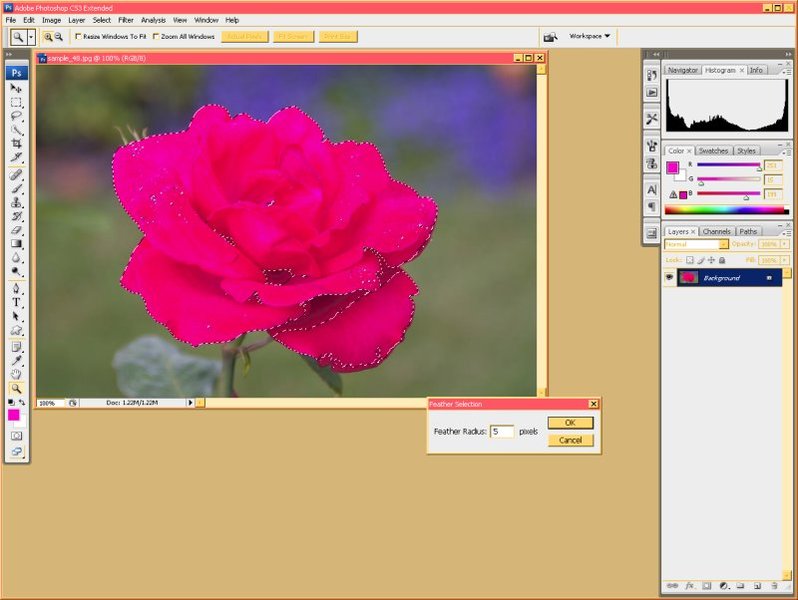
I modify the selection by Feathering by 5 Pixels:

View attachment 1314

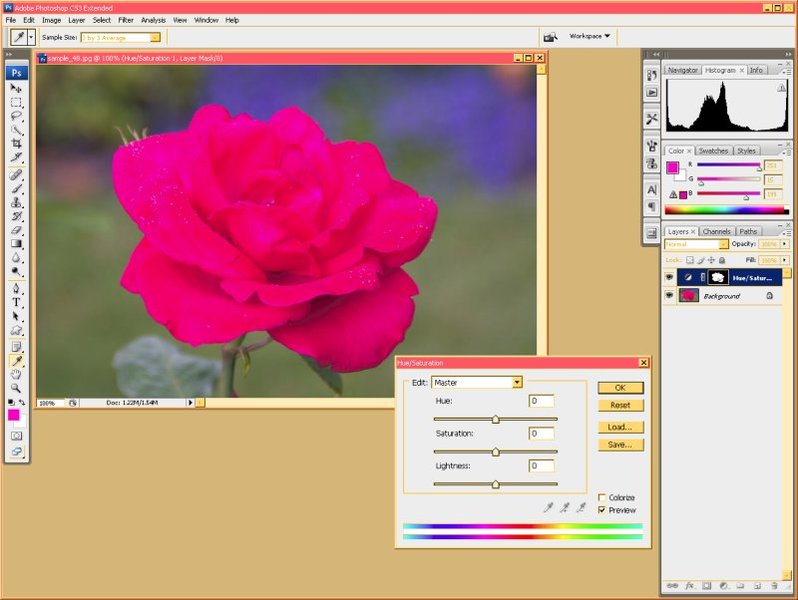
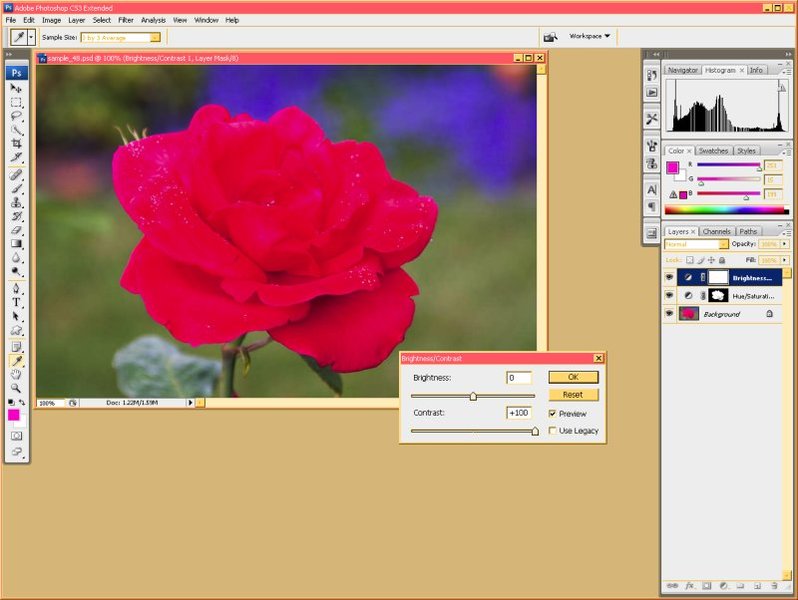
I then create a Hue Saturation Adjustment Layer and this takes the color selection as the mask where the adjustments are applied, only to the Red's and Magenta's of the Rose:

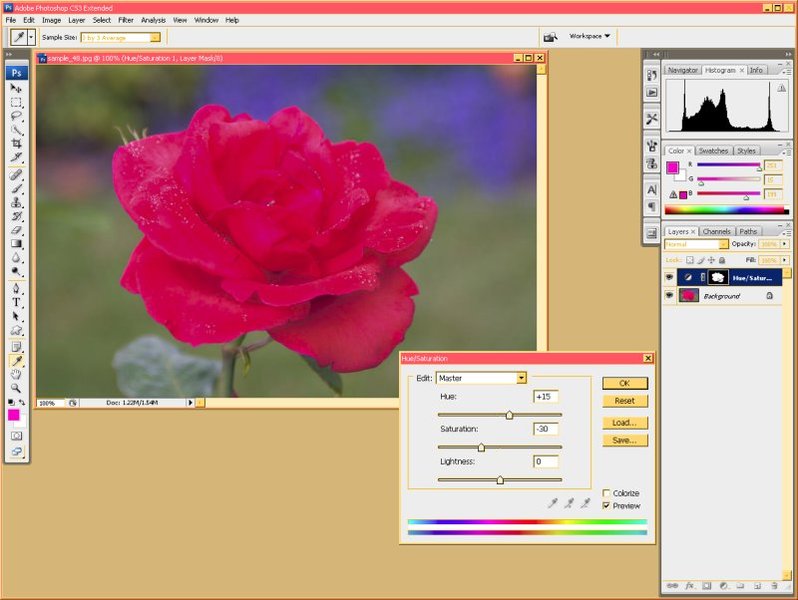
View attachment 1315

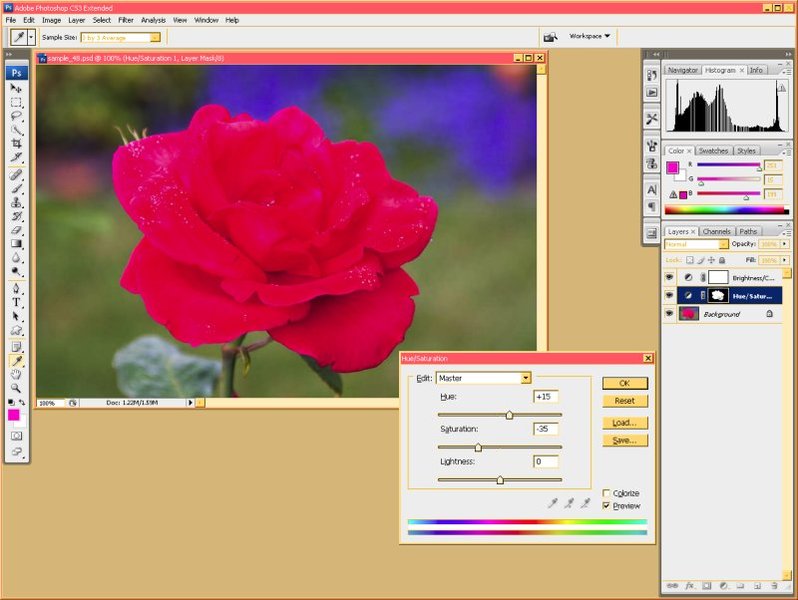
I reduced the Saturation by 30 and, for my own personal aesthetics, I increased the Hue by 15 for a redder Rose. In this image, you can easily see the histogram has been contracted :

View attachment 1316

Please note that these adjustments were by eye on my LCD monitor. I have not done any tests to see how well they would perform when printed or displayed on other devices.

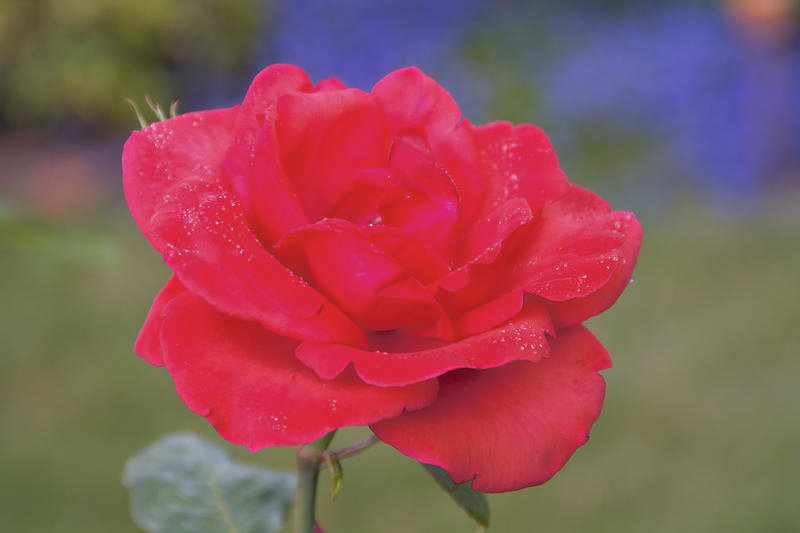
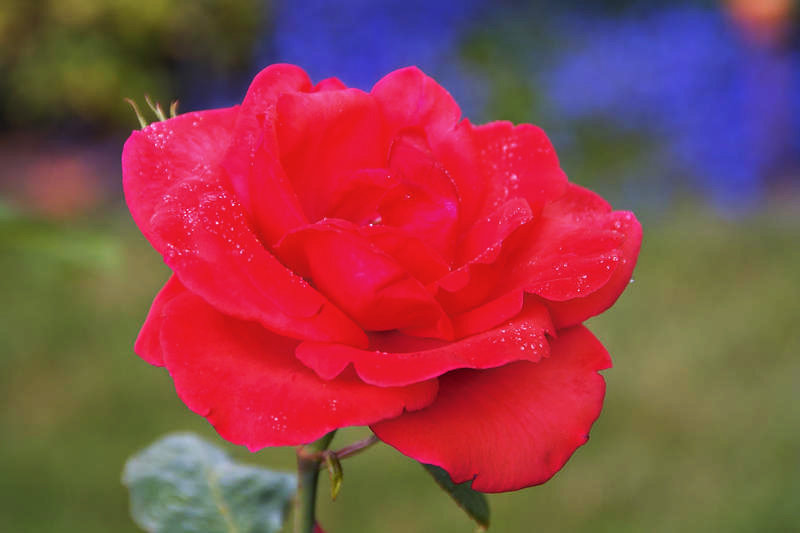
The final image:

View attachment 1317
 

Attachments

  • PS_SelColRan.jpg
    EXIF
    PS_SelColRan.jpg
    69.8 KB · Views: 2
  • PS_SelColRan2.jpg
    EXIF
    PS_SelColRan2.jpg
    67.6 KB · Views: 5
  • PS_FeaSel.jpg
    EXIF
    PS_FeaSel.jpg
    67.7 KB · Views: 4
  • PS_CreHueSatAdjLay.jpg
    EXIF
    PS_CreHueSatAdjLay.jpg
    71.6 KB · Views: 5
  • PS_Hue+15Sat-30.jpg
    EXIF
    PS_Hue+15Sat-30.jpg
    73.8 KB · Views: 3
  • sample_48_adjusted.jpg
    EXIF
    sample_48_adjusted.jpg
    126.6 KB · Views: 6
Hi Steaphany,

well, it looks good! Thanks for your busy and highly intresting contribution. :z02_respekt::z02_respekt:.

I am surprised in a way, what you achieved with my basic image, since (downloaded!) it does not contain a colour depth more than 8 BITs RGB.

There is just one thing, which I find problematic going your workflow and that is WORK!

To me it appears most difficult and time consuming to select the rose in PS?!

See you with first class contributions like this .... ;)

Klaus
 
Klaus,

That is the best part of this process, it's not labor intensive. I selected the whole Rose with only a handful of clicks. I'll demonstrate.

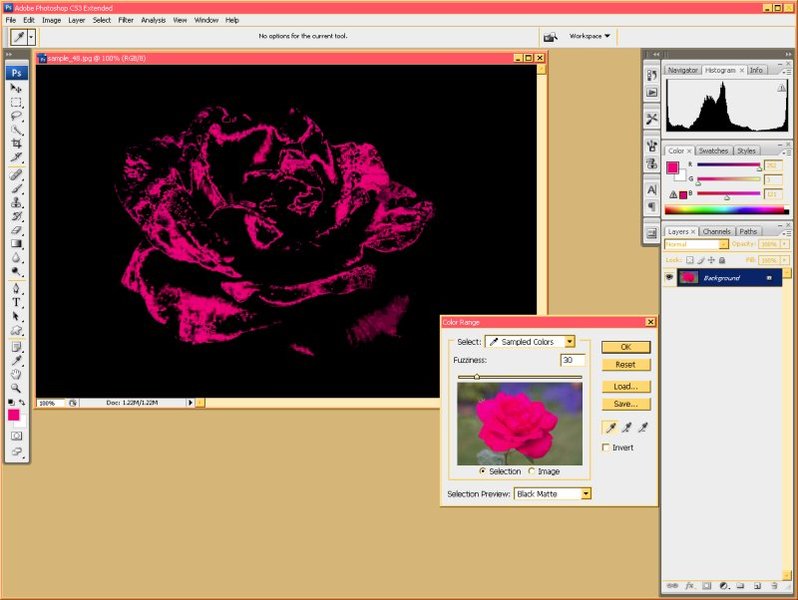
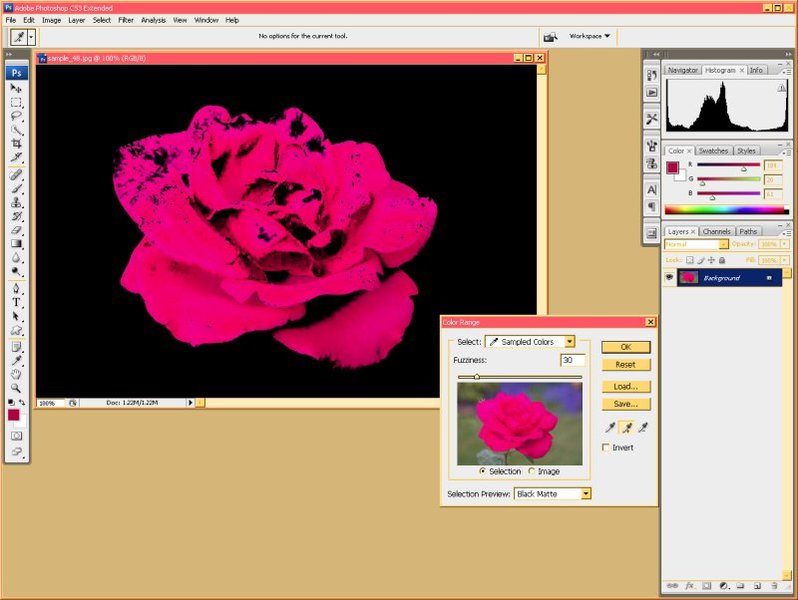
When you first open the Color Range Select tool, click on the Plus Eye Dropper color picker. This is the one which makes additions to the select set with each mouse click. In these screen captures, I have the Selection Preview set to Black Matte to better show my progress. Then start clicking in the Rose of the Original Photoshop image window. Here is what was selected after Mouse Click 1:

View attachment 1321

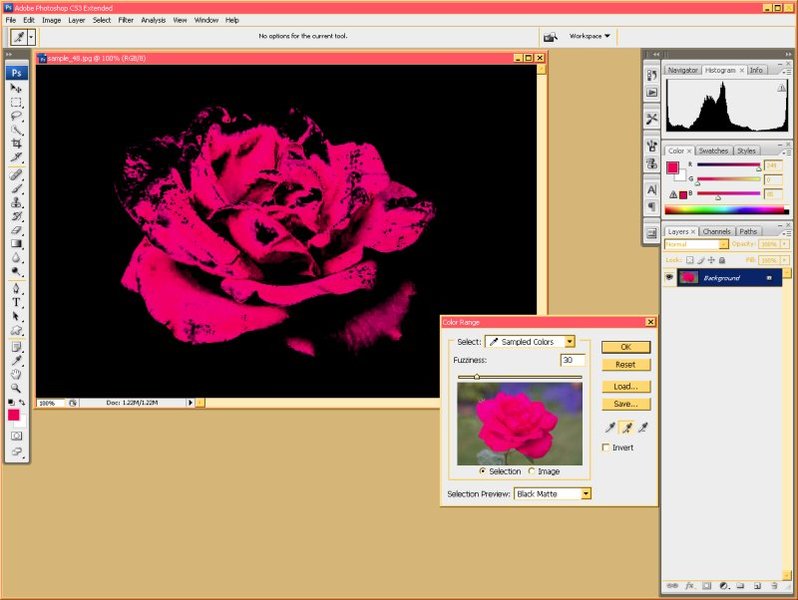
Then mouse click 2 added more to the selection, now we have nearly the whole Rose:

View attachment 1322

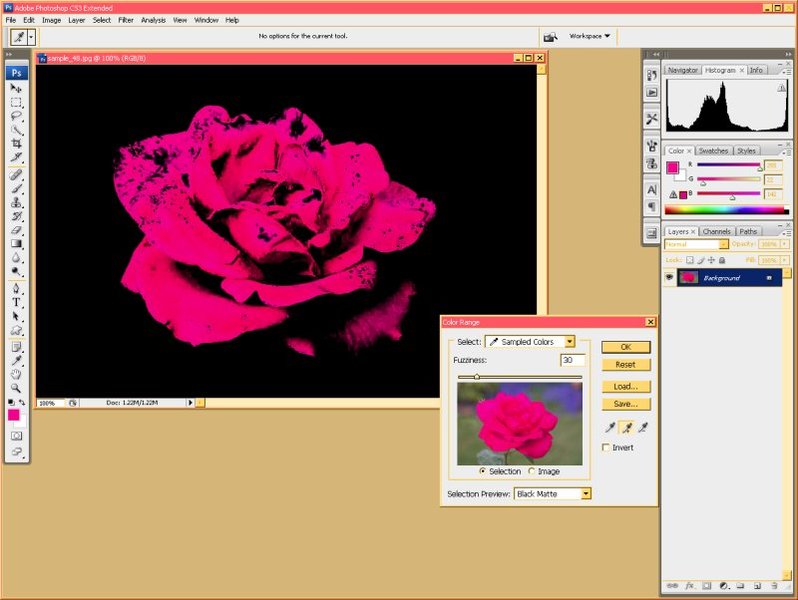
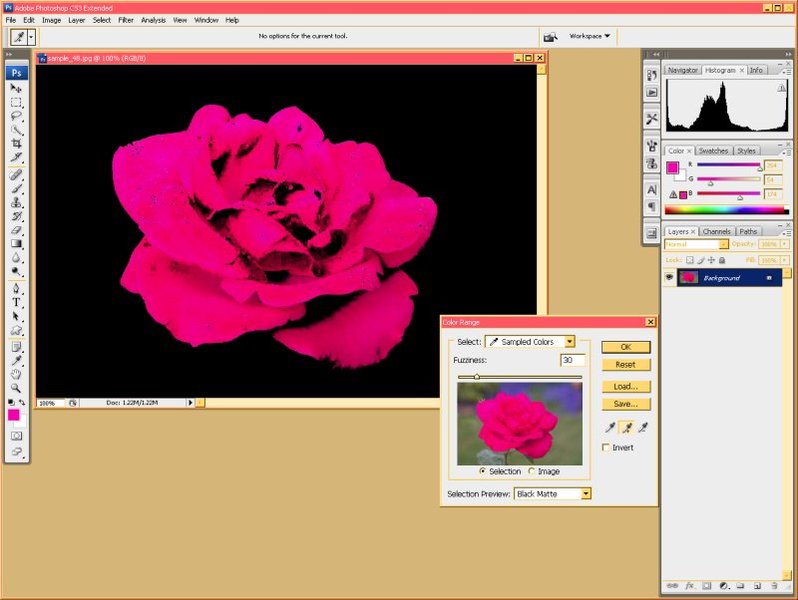
Mouse clicks 3 and 4 each contribute more:

View attachment 1323

View attachment 1324

Since the petals on the far side of the Rose still have black regions showing that there are areas still not selected, I clicked in one of these last remaining regions:

View attachment 1325

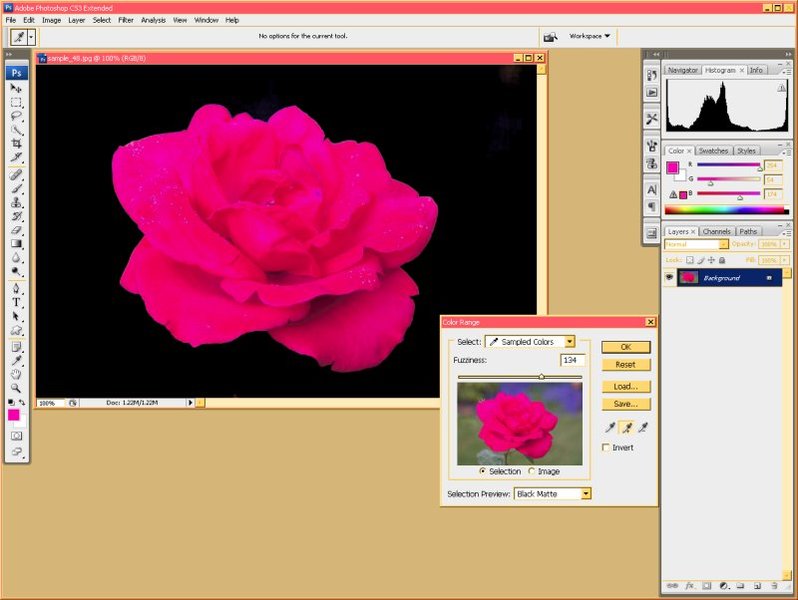
There it is, apart from a few shadow regions, the whole Rose has been selected based on color with only 5 Mouse Clicks. To finish this off, I raised the Fuzziness from 30 to 134 and you'll have this:

View attachment 1326

A Fuzziness of 30 was insufficient, 134 rounds off the sampled color selection points to select the whole Rose. Going beyond 134 ends up in parts of the background being added to the selection.

That's all there is to the magic, Open the Color Range select tool, set it up, click the mouse 5 times, and adjust a single slider. Click OK and you can go on to perform what ever manipulations you want.
 

Attachments

  • Click-1.jpg
    EXIF
    Click-1.jpg
    75.5 KB · Views: 5
  • Click-2.jpg
    EXIF
    Click-2.jpg
    75.3 KB · Views: 4
  • Click-3.jpg
    EXIF
    Click-3.jpg
    74 KB · Views: 6
  • Click-4.jpg
    EXIF
    Click-4.jpg
    73.3 KB · Views: 10
  • Click-5.jpg
    EXIF
    Click-5.jpg
    70.9 KB · Views: 9
  • Raise_Fuzziness.jpg
    EXIF
    Raise_Fuzziness.jpg
    67.9 KB · Views: 5
Hi Stephany,

thanks again for your well done screen-shots! :)

All this might become more difficult, as soon as a scene is more challenging/difficult .... with a similar coloured background?!

However .... it works! :)

See you with nice pictures

Klaus
 
Back
Top